PMA Lab 18-01: Packers and Unpacking
Lab 18-01: Packers and Unpacking
Lab 18-01
Your goal for the labs in this chapter is simply to unpack the code for further analysis. For each lab, you should try to unpack the code so that other static analysis techniques can be used. While you may be able to find an automated unpacker that will work with some of these labs, automated unpackers won’t help you learn the skills you need when you encounter custom packers. Also, once you master unpacking, you may be able to manually unpack a file in less time than it takes to find, download, and use an automated unpacker.
Each lab is a packed version of a lab from a previous chapter. Your task in each case is to unpack the lab and identify the chapter in which it appeared.
The files are Lab18-01.exe through Lab18-05.exe.
Notes
This is an interesting challenge, to which I would like to extend the difficulty, and increase realism.
- As recommended in the Lab guide, using automated unpackers won’t help learn the required skills, so I won’t be using any automated tools.
- As per the Lab guide, each lab is a packed version of a lab from a previous chapter. However, I won’t be checking one by one or fully analyzing the code on each file just to see if I remember the exercise. Instead, I will expand some of the content that is not necessarily covered in Practical Malware Analysis.
- In this exercise we already know that all files are packed, however, in real scenarios we don’t. Here I’ll briefly analyze each file and confirm how one could get to the conclusion that they are packed, and which packer is used. From there, I’ll start the unpacking process.
Unpacking
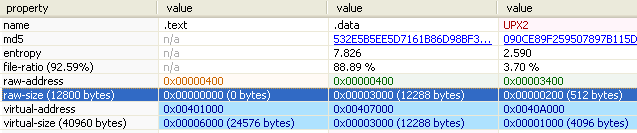
Using PEStudio, it is possible to find out that this file is packed with UPX.
- It has a very high entropy (7.5)
- Doesn’t have any interesting strings, aside from Imported libraries.
- The same applies to the Imports, there are not many imports and the majority are imports usually used in Unpacking routines (LoadLibrary, and GetProcAddress, and also VirtualAlloc and others). There are two other imports, from different libraries (GetUserNameA from advapi32.dll, and URLDownloadToCacheFileA from urlmon.dll). This may indicate that the Packer left one import function from each DLL contained in the Original Import Table.
- It has a section called UPX2.
With this, the Malware needs to be unpacked. By opening the program, and scrolling for a while it is possible to find the possible OEP:
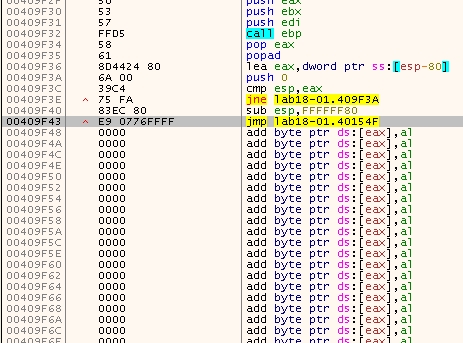
The entry point of the packed executable is within the .data section, and not only it is making a big jump (89F4 bytes), the “destination” address falls into a different section, which makes it even more suspicious:
Also, the entry point of the unpacking stub points to a pushad instruction, and near the tail jump we can see the popad instruction.
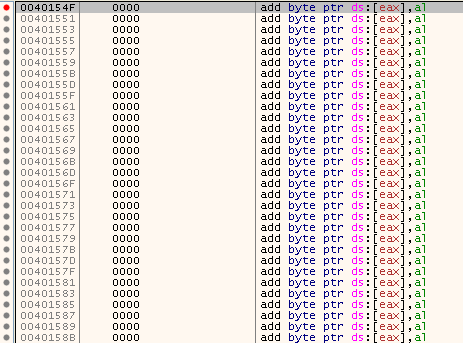
Currently that memory region is filled with Null bytes, but by the time EIP reaches this address this zone will be fully decrypted. We can place an Hardware breakpoint on execution:
And, by pressing F9, the Malware will run the unpacking stub for us and stop at the OEP:
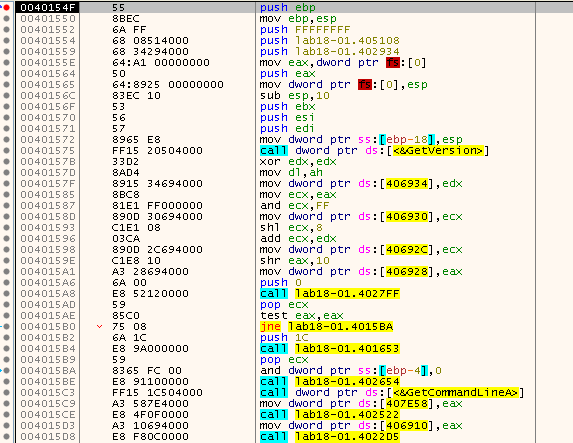
Now that the OEP has been found, we can dump the executable using Scylla:
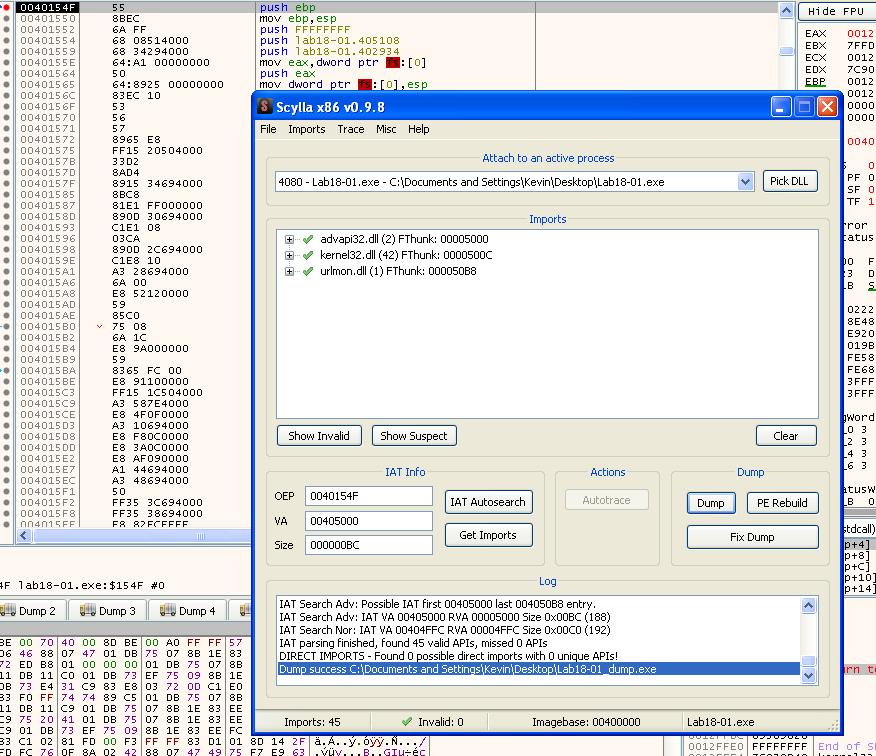
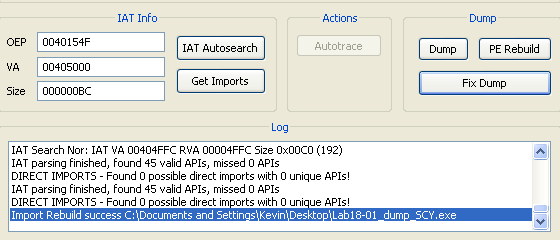
We can also use Scylla to automatically fix the IAT:
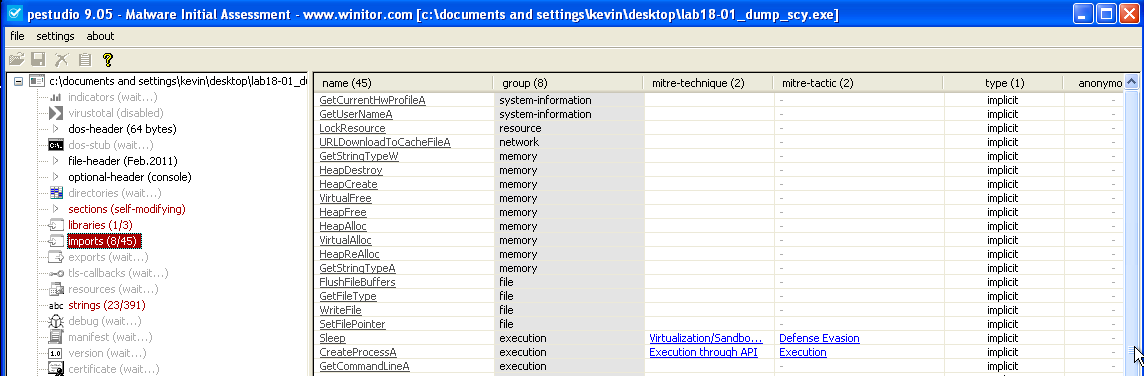
Opening the dumped file in PEStudio, we can find much more meaningful information regarding what the binary might so such as Strings:

And also, Imports:
In this case, it was even possible to run the Sample without any problems:

Finding the original sample
To finish the exercise we need to identify the chapter in which the unpacked binary appeared. For an initial triage I’ll use Fuzzy Hashing, which is a technique used to identify similarities between files based on their content, even if the files are not identical.
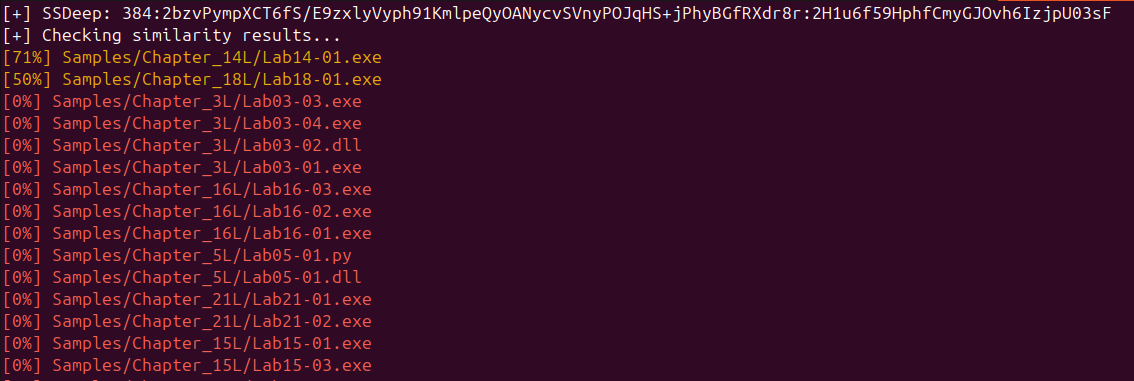
I created a simple script using ssdeep, which is fuzzy hash algorithm, and created a logic to provide an input sample, and compare it against all files within a directory (recursively). Here, I’m comparing the unpacked sample against the PMA Sample directory:
The ssdeep Python script can be found here.
The output returns all similarity scores from the most similar to the least. There are two candidates, Lab14-01.exe (71% similarity), and **Lab18-01.exe **(50% similarity).
Lab18-01.exe is the packed sample, and the 50% similarity score is due to the fact that the unpacked sample maintained the unpacking stub and other code added by the packer. Discarding Lab18-01.exe for obvious reasons, that leave us with Lab14-01.exe.
Instead of opening both samples side by side and starting to compare them, I’ll use BinDiff.
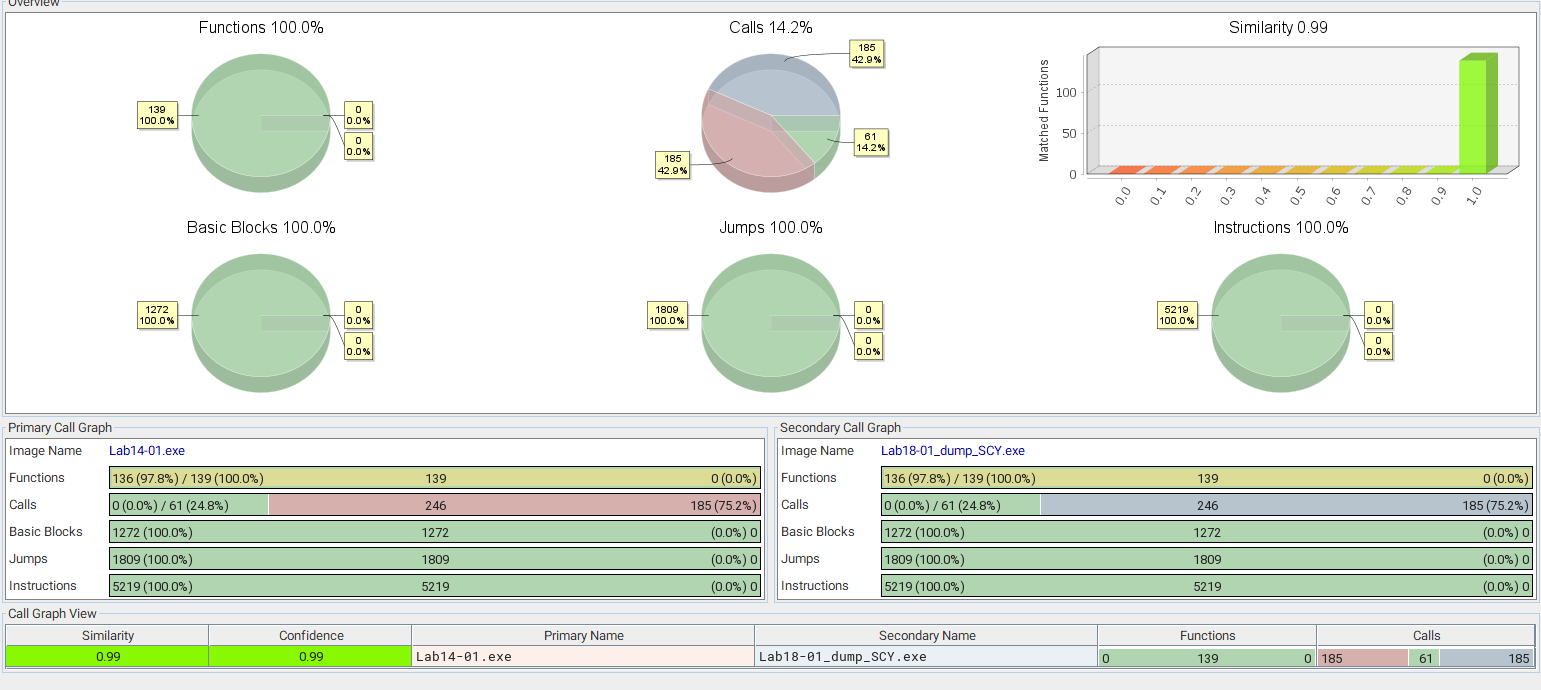
From this view right here, we can find out that:
- Similarity and confidence in the results is 0.99, which means that both samples are almost identical.
- The similarity between functions, basic blocks, jumps and instructions is 100%, another good indicator.
- The only difference here is in terms of calls. But this is likely because of the stub part of the code that is still present in the unpacked code.
The fuzzy hashing algorithm was effective for initial triage and narrowing down potential candidates. However, using BinDiff it was possible to confirm with high confidence that the unpacked sample and the original binary are structurally almost identical. Hence, Lab14-01.exe is the sample packed into Lab18-01.exe.